Key Takeaways for Your Project
- Plan and design everything before a single hammer swings.
- Demolition must happen first, followed by structural and "rough-in" work.
- Install flooring and cabinets before final painting and backsplash.
- Save the appliances and final trim for the very end to prevent damage.
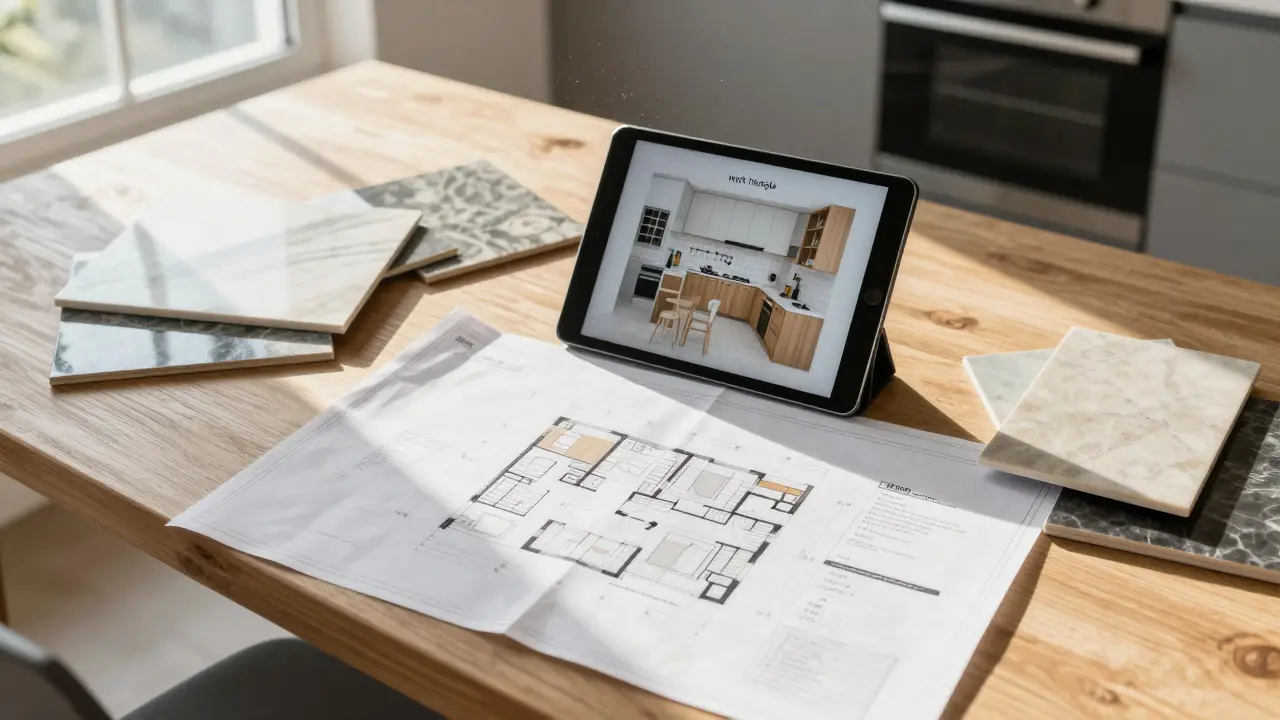
The Blueprint Phase: Planning and Design
Before you touch a tool, you need a map. Most homeowners make the mistake of picking a pretty tile and then trying to build a kitchen around it. Instead, start with the Kitchen Layout is the strategic arrangement of work zones, typically following the 'work triangle' concept involving the sink, stove, and refrigerator.
You need to decide if you're sticking with your current footprint or knocking down walls. If you're moving a sink, you're moving plumbing; if you're adding an island with a microwave, you're running new electrical lines. I've seen projects stall for weeks because the homeowner forgot to check if their Electrical Panel the central distribution point for electricity in a home that manages circuit breakers had enough amperage to support a high-end induction cooktop. Get your permits in order now, not when the inspector shows up and tells you to tear out your new drywall.
The Messy Part: Demolition and Site Prep
Once the design is locked, it's time for the teardown. This is where you rip out the old cabinets, peel up the linoleum, and remove the old appliances. But don't just start swinging a sledgehammer. Shut off the water and power first.
During demolition, you'll often find "surprises"-like a leaky pipe behind a wall or outdated Knob-and-Tube Wiring an early method of electrical wiring used in the late 19th and early 20th centuries, now considered a fire hazard in modern homes. This is the only time in the project where it's okay to be messy. Once the room is gutted, clean it thoroughly. Dust is the enemy of a good paint job and a smooth floor installation.
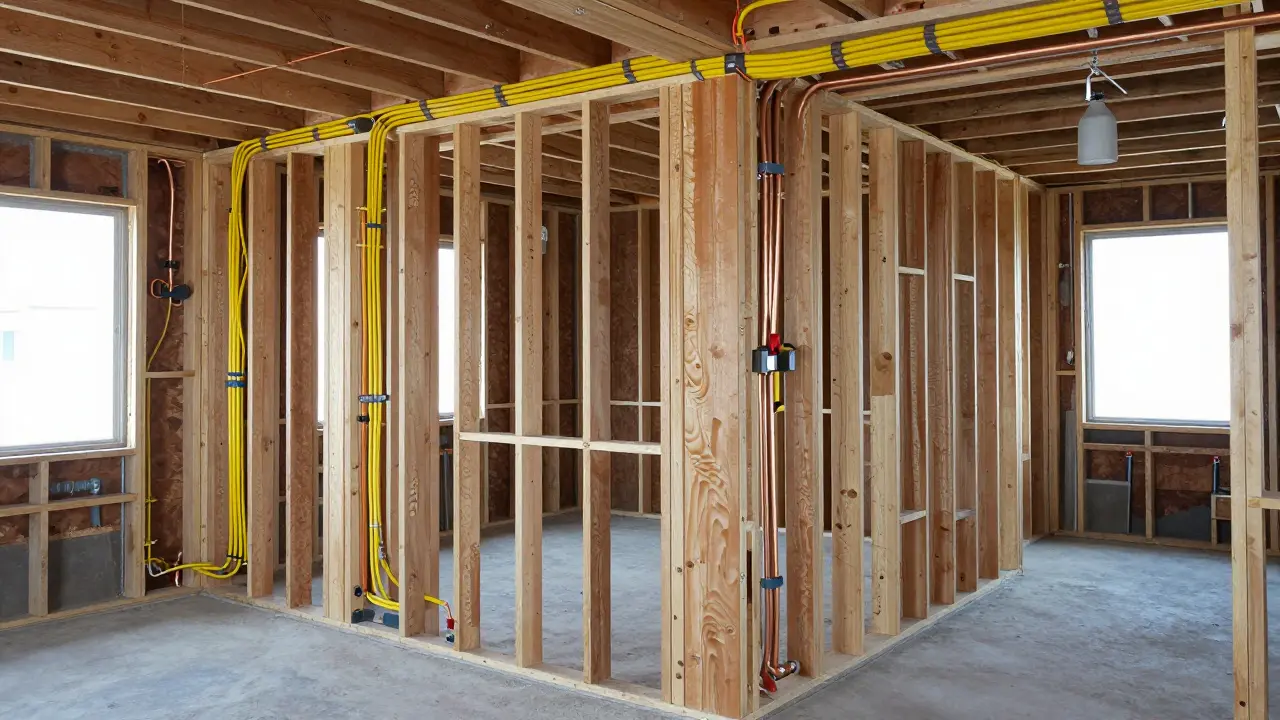
The Invisible Work: Rough-ins and Structural Changes
Now that the walls are open, you enter the "rough-in" phase. This is the stage where Plumbing and Electrical Work the installation of pipes, wires, and ducts within walls before they are closed with drywall happen. If you want pot lights in the ceiling or a pot filler over the stove, this is when the wires and pipes go in.
If you're changing the layout, you might need to install a Load-Bearing Wall a wall that supports the weight of the floor or roof above it; replacing one requires a structural beam or a support beam. This must be done and inspected before moving to the next step. If you wait until the cabinets are in to realize your outlet is six inches too low for your new counter height, you'll be paying a premium to tear everything back out.
Closing the Walls: Drywall and Priming
After the inspectors sign off on your electrical and plumbing, it's time to close the walls. Install the Drywall panels made of gypsum pressed between two sheets of paper, used to create interior walls, tape the seams, and apply joint compound.
Pro tip: Do not do your final painting now. The sanding process for drywall creates a fine powder that gets everywhere. Instead, apply a high-quality primer. This seals the walls and gives you a base. If you do the final coat of paint now, you'll spend the next three months touching up scratches made by cabinet installers and appliance deliveries.
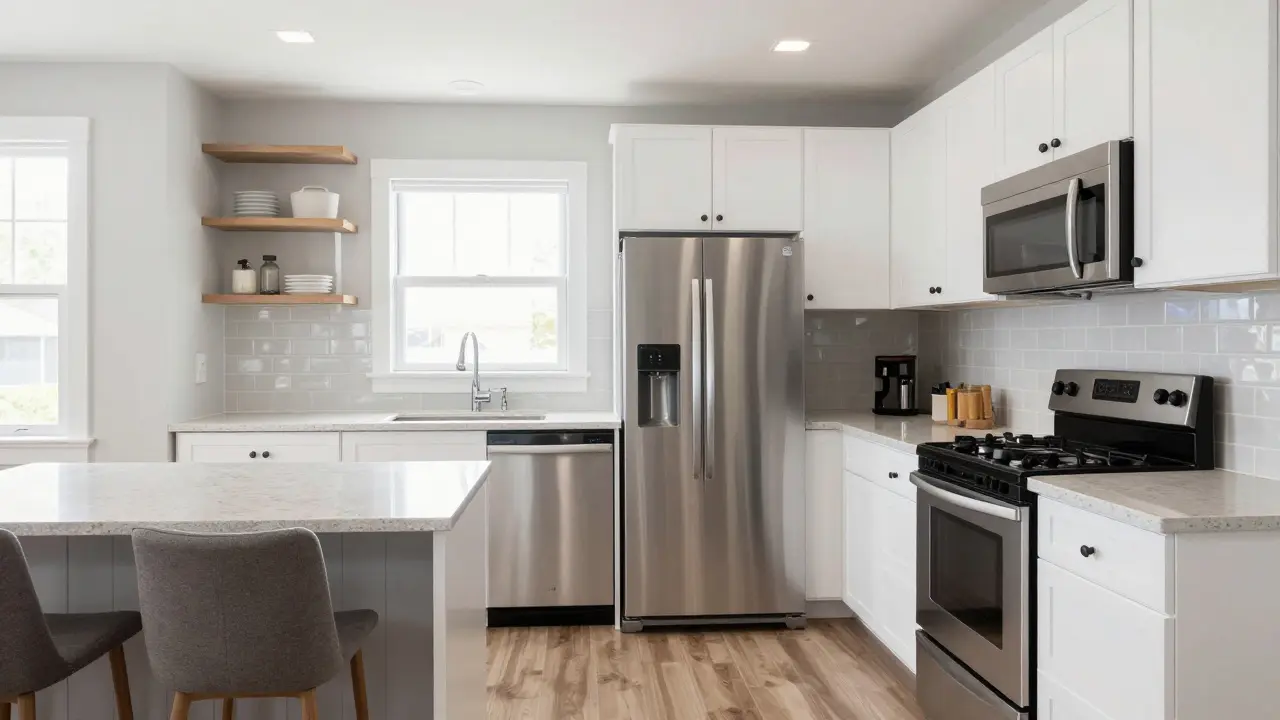
The Foundation: Flooring and Cabinetry
There is an age-old debate: floors first or cabinets first? For most modern renovations, the answer is floors first. Installing Hardwood Flooring natural wood planks installed as a permanent floor surface, often finished with polyurethane or luxury vinyl plank across the entire room ensures a seamless look. If you put cabinets in first, you'll have a gap in your flooring that looks like an afterthought if you ever decide to change your cabinet layout in ten years.
Once the floor is down (and protected with heavy paper), bring in the Cabinetry the storage units and countertops that define the kitchen's functional layout. Start with the base cabinets, then the uppers. This is the moment your kitchen actually starts to look like a kitchen. Ensure your installer uses a laser level; a slight tilt in the base cabinets will make your expensive countertops look crooked.
| Phase | Key Action | Why Now? |
|---|---|---|
| Planning | Layout & Permits | Prevents costly structural errors. |
| Demo | Removal of old units | Clears space for new infrastructure. |
| Rough-ins | Electrical & Plumbing | Must be done while walls are open. |
| Surface | Drywall & Flooring | Creates the shell for the finishings. |
| Install | Cabinets & Counters | The main structural elements of the room. |
| Finish | Backsplash & Paint | Protects walls from installation debris. |
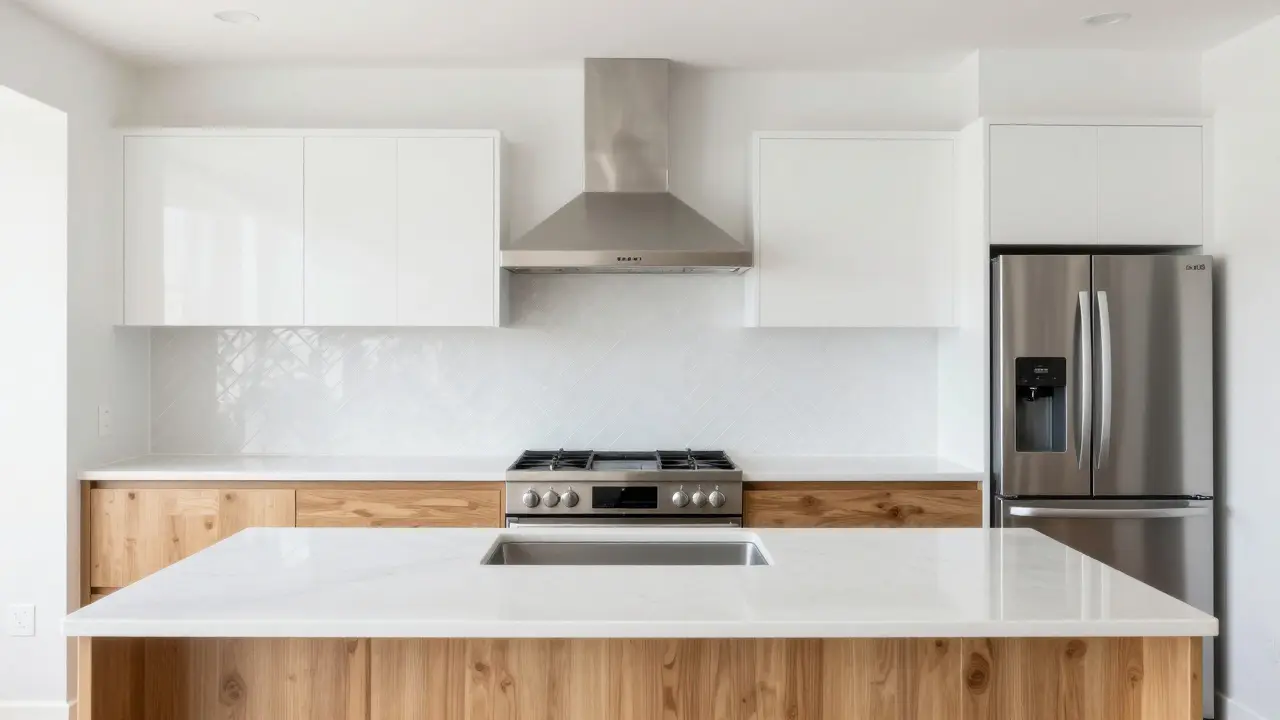
The Final Touch: Countertops and Backsplashes
You cannot install your Quartz Countertops engineered stone surfaces made from quartz aggregates and resin, known for durability and non-porosity until the base cabinets are perfectly installed and leveled. The fabricator will come in to take a "template" (a precise measurement) of your cabinets. Only then is the slab cut.
Once the counters are in place, you can move to the Backsplash a panel of tiling or other material installed on the wall behind the stove and sink to protect from splashes. Doing this after the counters prevents the tile from being chipped by the heavy stone slabs being slid into place. Now is also the time for your final coat of paint-the walls are clean, the dust has settled, and you can paint around your new cabinetry for a crisp, professional edge.
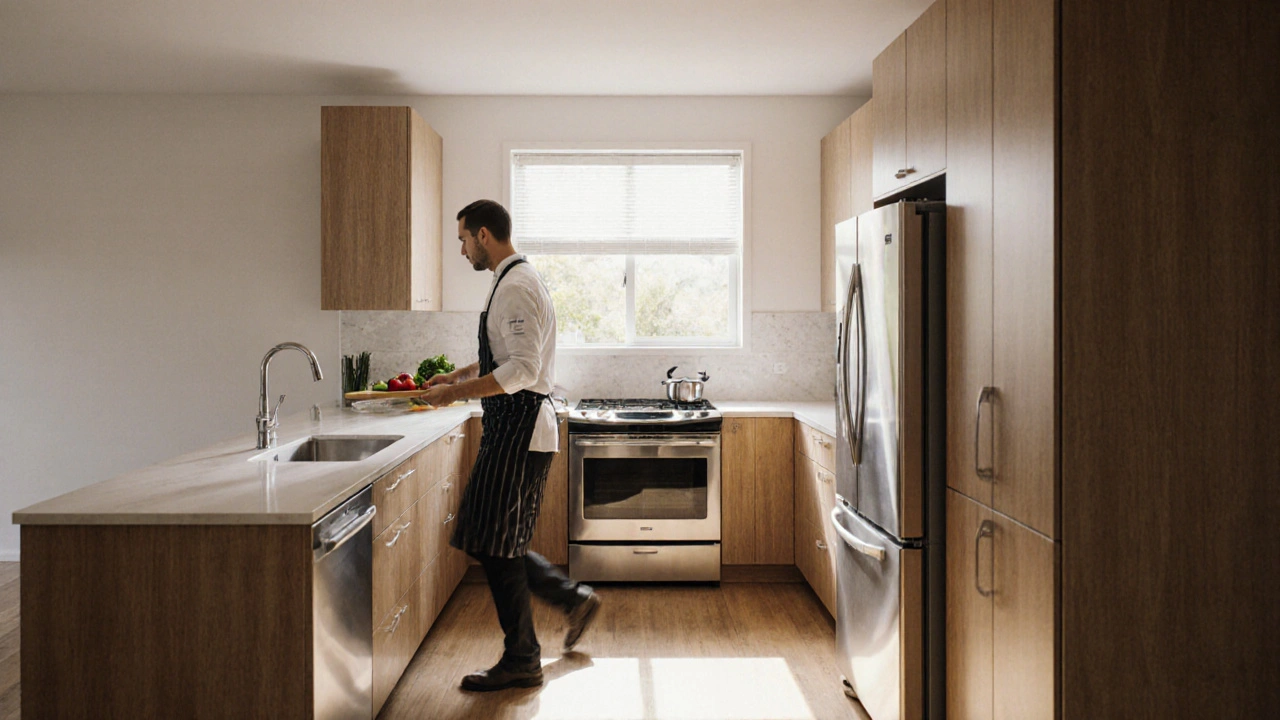
The Homecoming: Appliances and Finishing
The last things to enter the room are your appliances. Why? Because moving a 300-pound refrigerator into a kitchen that is already "finished" is a recipe for dented walls and scratched floors. Slide in the dishwasher, hook up the stove, and set the fridge.
Finally, add the trim, the baseboards, and the hardware. Installing the cabinet handles last allows you to adjust them perfectly to your grip. Once you've cleaned the surfaces and removed the protective floor paper, your kitchen is ready for its first meal.
Should I paint the walls before or after installing cabinets?
You should prime the walls before cabinets go in, but do the final coat of paint after. Cabinet installation involves a lot of movement, drilling, and occasional scuffs. If you paint the final layer first, you'll likely spend more time fixing nicks and scratches than you would if you just waited until the end.
Can I install the backsplash before the countertops?
No. The countertop provides the essential bottom edge and a level surface for your backsplash tile to rest on. If you install the tile first, you risk cracking the grout or chipping the tile when the heavy countertops are installed. Always go: Cabinets $ ightarrow$ Countertops $ ightarrow$ Backsplash.
Do I need to replace the flooring if I'm keeping the same layout?
Not necessarily, but it's recommended. Removing old cabinets often reveals gaps or damage in the flooring. Even if the floor looks okay, the transition between new cabinets and old flooring can look disjointed. If your budget is tight, you can keep the floor, but be prepared for some patching.
When is the best time to buy appliances?
Buy them during the planning phase. You need the exact specifications (width, depth, height) of your refrigerator and stove to design your cabinets. However, arrange for the delivery to happen at the very end of the project to avoid them taking up space or getting damaged during demolition.
What happens if I find mold during demolition?
Stop immediately. Demolition is the only time you'll see the "skeleton" of your walls. If you find mold or rot, you must treat it and replace the damaged studs before you close the walls with drywall. Ignoring it now will lead to a much more expensive problem once your new cabinets are installed.
Next Steps for Different Project Scales
If you're doing a cosmetic refresh (painting cabinets, new counters), you can skip the rough-in and demolition phases. Simply prep the surfaces, install the counters, and finish with a backsplash.
If you're doing a full-gut renovation, stick strictly to the sequence above. The biggest risk here is "scope creep," where you decide to move a wall halfway through the project. Resist the urge. Stick to your blueprint, or you'll find yourself paying a contractor to redo work they've already finished.
For those planning a luxury overhaul with smart appliances and custom integrated lighting, add a specific "Technology Walkthrough" after the rough-ins. Ensure every smart hub and sensor is placed exactly where you want it before the drywall hides them forever.

Kirk Doherty
April 15, 2026 AT 12:52been there with the floor first thing... definitely saves a lot of stress later on
Aimee Quenneville
April 16, 2026 AT 00:35omg imagine actually following a plan... truly revolutionary!!!!’ my last contractor just wingd it and now my sink is basically in the living room lollll!!!!
Meghan O'Connor
April 17, 2026 AT 06:00The phrase "the most complex room in your house" is a blatant exaggeration. It is simply a room with specific plumbing requirements. Also, the formatting of your list is amateurish at best. I've seen better sequencing in a preschool art project. It's honestly exhausting how many people think they can just 'guide' others through a remodel without mentioning the specific grade of drywall needed for moisture-prone areas like kitchens. You completely glossed over the importance of mold-resistant boards in the wet zones, which is a basic failure in technical writing. I cannot believe people actually find this helpful when it misses such fundamental details. It's a lazy summary of a process that takes years of professional experience to master. The lack of depth here is genuinely insulting to anyone who has actually held a hammer. Just typical internet fluff designed for clicks rather than actual utility. Absolute rubbish.
Cynthia Lamont
April 18, 2026 AT 09:39OMG I can't even with this! The nerve to just tell people to 'stop immediately' if they find mold! Like, hello?! We're talking about our homes here, not some dollhouse! This is just so simplistic and it's actually making me scream! I've seen way more detailed guides on a napkin!
Liam Hesmondhalgh
April 19, 2026 AT 07:54The sheer lack of attention to detail in this guide is appalling. For one, the punctuation in the takeaway section is inconsistent. If you can't even manage a basic list, why should we trust your structural advice? It's a disgrace to the trade.
Dmitriy Fedoseff
April 20, 2026 AT 17:40This approach ignores the cultural nuance of how different societies view the heart of the home. In many traditions, the kitchen isn't just a 'work triangle' of efficiency, but a communal hub. Reducing a home's soul to a set of plumbing rough-ins is the height of industrial arrogance. You treat the process like an assembly line in a factory rather than an evolution of a living space. It is an aggressive oversimplification of what should be a mindful transition.
Patrick Tiernan
April 20, 2026 AT 22:22imagine actually paying for a permit lmao just hide the wires and hope for the best
Patrick Bass
April 21, 2026 AT 04:19I agree with the sequence of operations described here.
Morgan ODonnell
April 21, 2026 AT 10:28it's a bit stressful thinking about all those steps but i guess it makes sense to do it this way
adam smith
April 21, 2026 AT 11:42I find this information to be quite helpful. Thank you for sharing these steps with us.
Jennifer Kaiser
April 21, 2026 AT 13:06We have to realize that the stress of a remodel is often a reflection of our own desire for control. While the sequence is logically sound, the emotional toll of living in a construction zone for months is the real challenge. I've seen families drift apart over a backsplash choice. It's not just about the drywall, it's about the patience we cultivate when our sanctuary is stripped bare. We must be kind to ourselves and our partners during this chaos because a perfect kitchen is worthless if the people inside it are miserable.